The day before the measurement:
Glue the flies on hooks, put them into the single-fly valves and give them sugar and water to survive the night. Store them at the appropriate temperature
The day of the measurement:
1. Put the fly in position
Select a fly and put it in the clamp. Then put the clamp in the holder and position the ping-pong ball (or generally, the measurement environment) around the fly.
2. Set up the camera
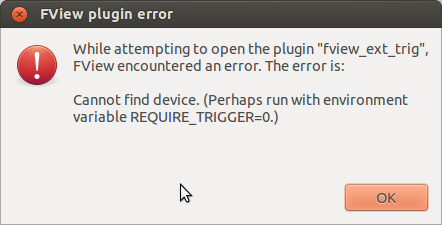
Start the computer and open fview (either by typing “fview” in a terminal or clicking the fview symbol on the launcher). Close the error message that fview produces.
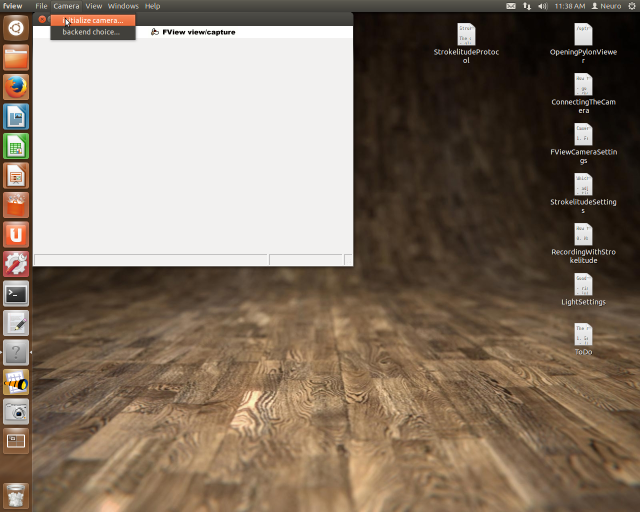
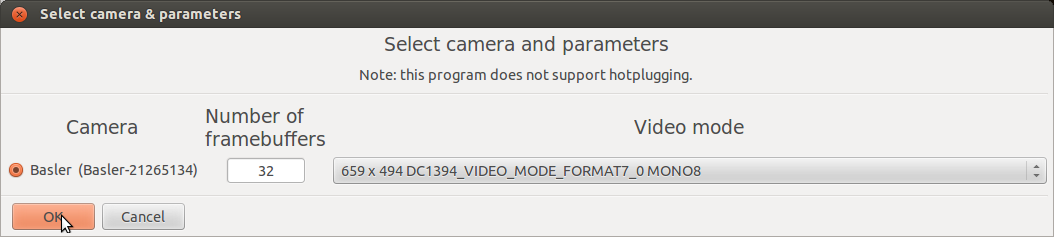
Then initialize the camera (click “Camera” -> “Initialize Camera” and click OK in the window that pops up).
If fview does not list your camera as a candidate for initialization, you may have to configure your connection to the camera. Go to the Ubuntu System Settings and select “Networks”. Here, select the connection via which the camera should be connected to your computer. Open “Options” and “IPv4 Settings” and set “Method” to “Local Only”.
In case the image you get after initialization is very small (only a tiny square in the upper left corner of the fview window), change to a different desktop and back. This should usually solve the issue.
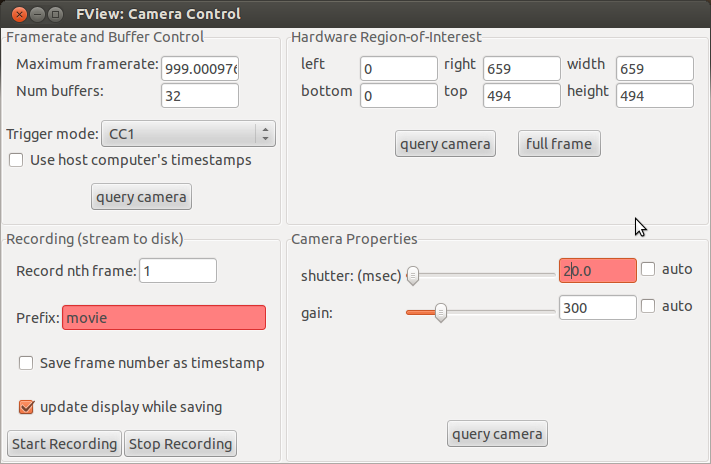
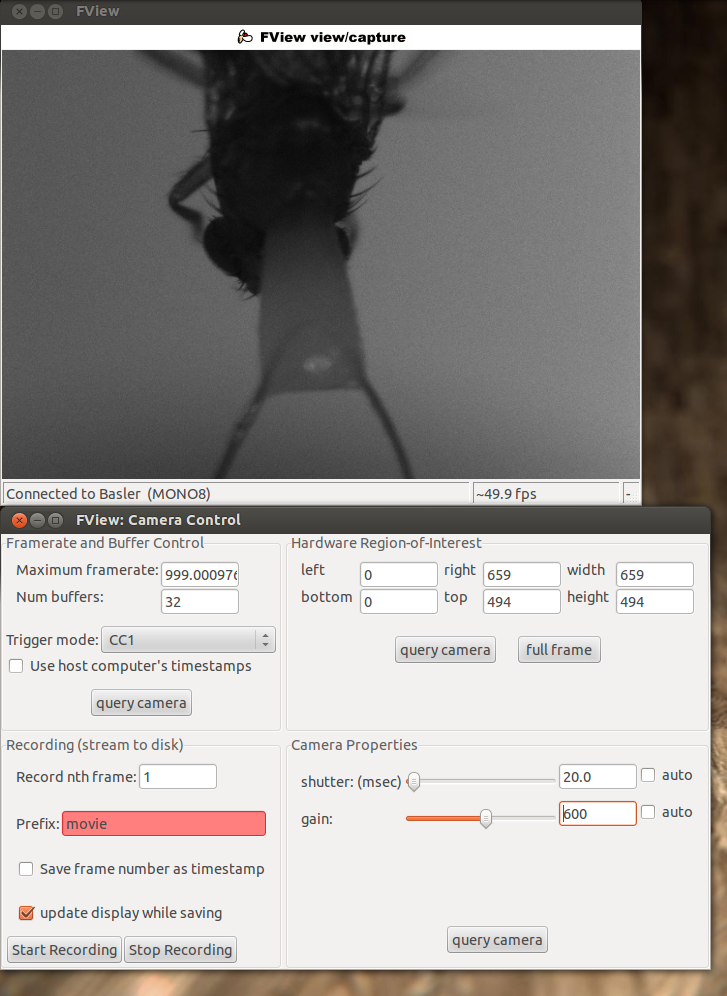
Open the camera settings (via “Windows” -> “Camera Controls”) and put the “shutter(msec)” to 20. During the actual recording the shutter should be at 10 msec to reach a sampling rate of ~100Hz, but for the setup it is more convenient to have it at 20 or 30. Now adjust the gain until you can see something on the picture. Then use the micro-manipulator to move the camera until you have a good image of the fly.
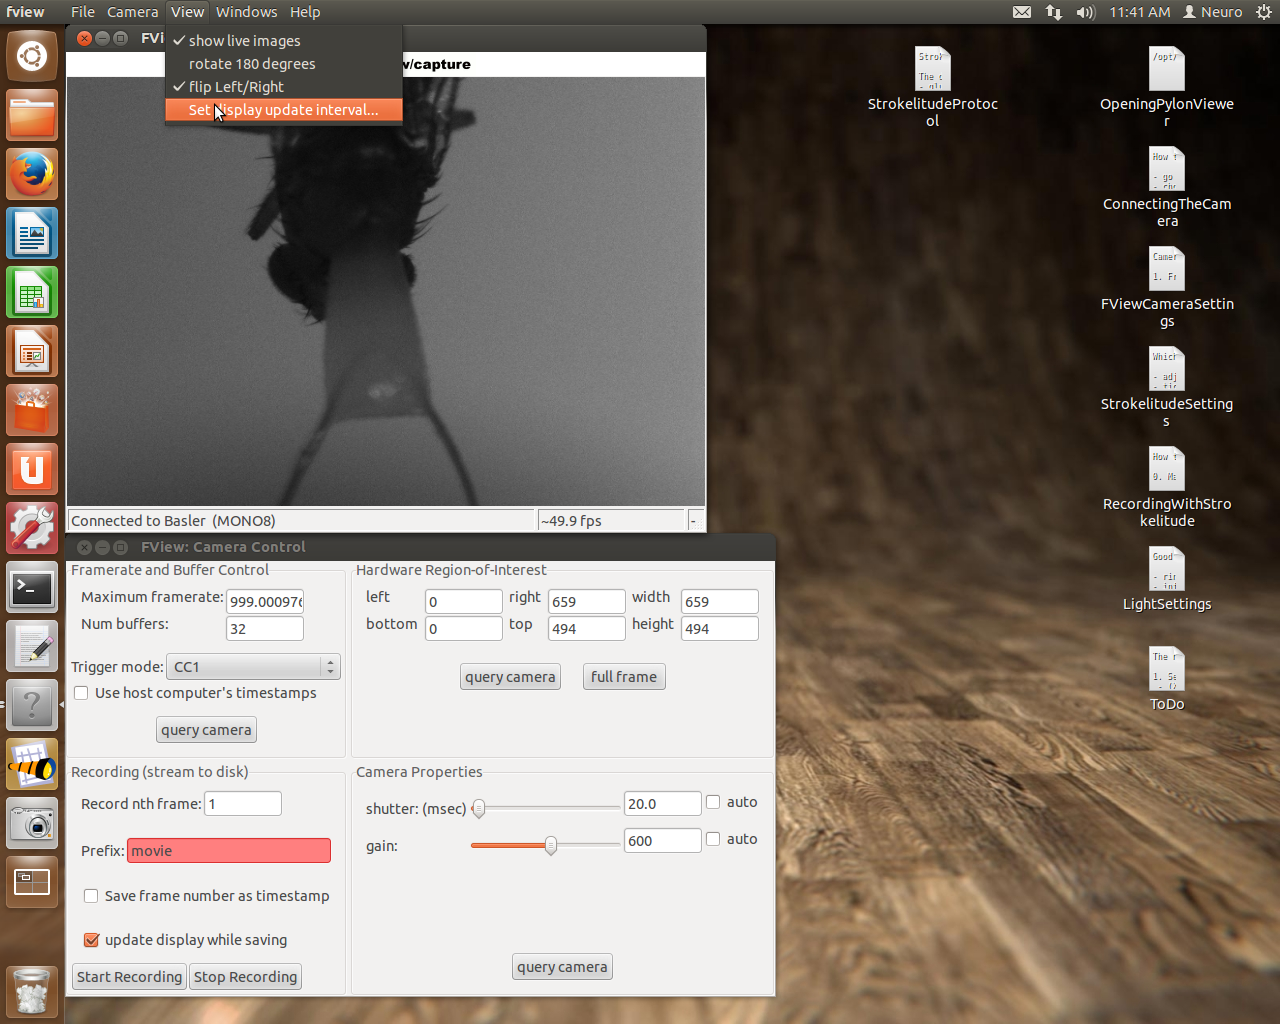
Before you start strokelitude, make sure that the display update interval is set to 1. During the recording, you may want to set this higher in order to be able to use lower values of “shutter (msec)” in the camera controls (i.e. a higher sampling rate). If you use a 10msec shutter with a display update interval of 1 it may happen that the program crashes. However, when you change settings in strokelitude, you should have a display update interval of 1, since the program might crash otherwise for unknown reasons.
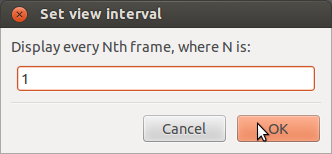
To set the display update interval, go to “View” -> “Set display update interval…”.
Open strokelitude. Go to “Windows” -> “-=|strokelitude|=-“. The click “Draw Mask”.
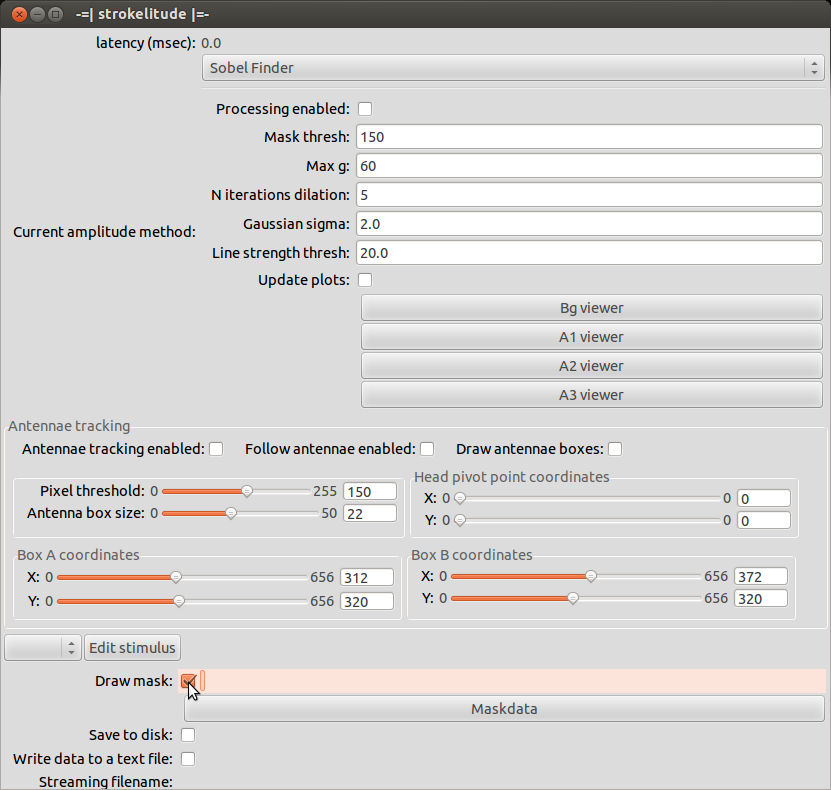
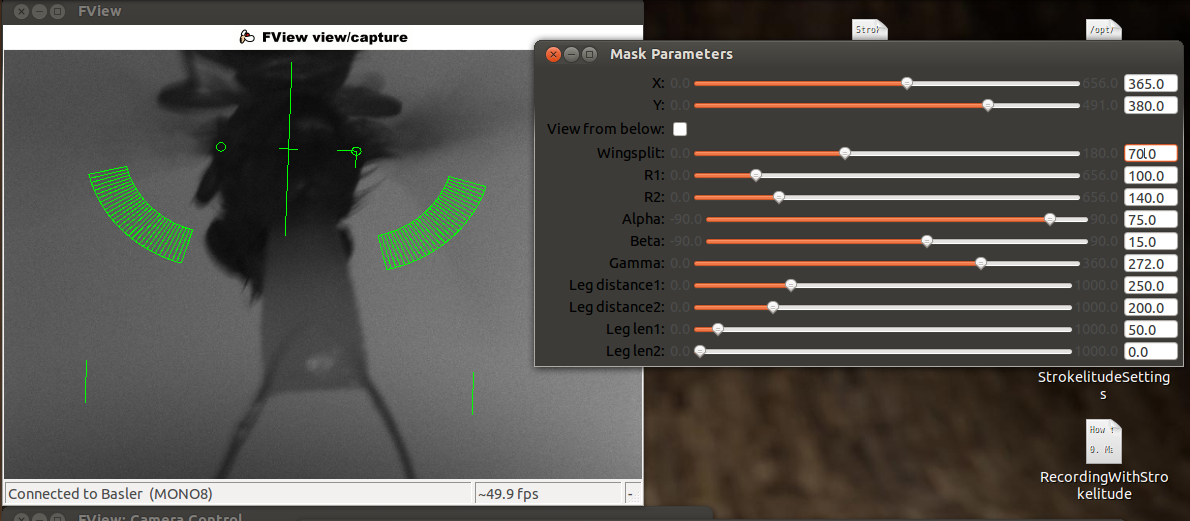
This will make some green lines appear on the screen. This is the mask for recording the fly. The two small circles should be on the roots of the wings and the line linking them should be orthogonal to the fly’s body axis (i.e. the orthogonal green line should be on the fly’s body axis). Unless you are very lucky (or very precise at fly handling), you will have to adjust the mask. To do this, click “Maskdata”. Another window will open.
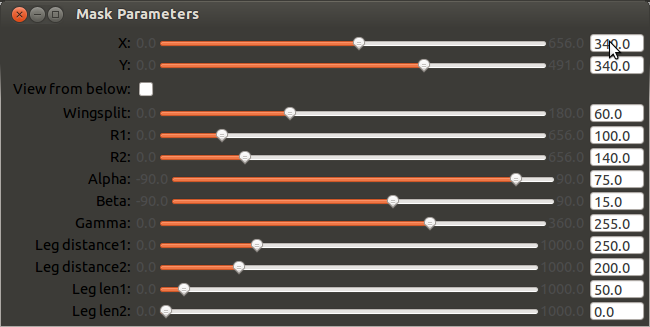
Use these parameters to fit the mask to the fly. With “gamma” you can rotate the mask and with “X” and “Y” you can shift it. Use these three parameters to position the two small circles to the wig hinges. You can manipulate the distance between the circles with “wingsplit”. Then you can use “R1” and “R2” to manipulate the inner and outer radii of the measurement sectors. With “alpha” and “beta” you can adjust the anterior and posterior borders of the measurement sectors. In general, these sectors should be positioned such that the anterior end of the wingstroke always falls inside. Optimally, nothing except for the wings should be within the sectors.
When you have set up the mask, close the window “Mask Parameters” and click “Antennae tracking enabled” in strokelitude.
![]()
This will make some more lines appear on the screen. Unless you are interested in tracking antenna movements, you can safely ignore those. Enabling antennae tracking is necessary, since strokelitude does not save the data otherwise.
As soon as you have enabled antennae tracking, you can set the display update interval back up, e.g. to 5. Now you can also set the “shutter (msec)” in the camera controls to the value you want to use during the recording (e.g. 10). This will change the brightness level of the video.
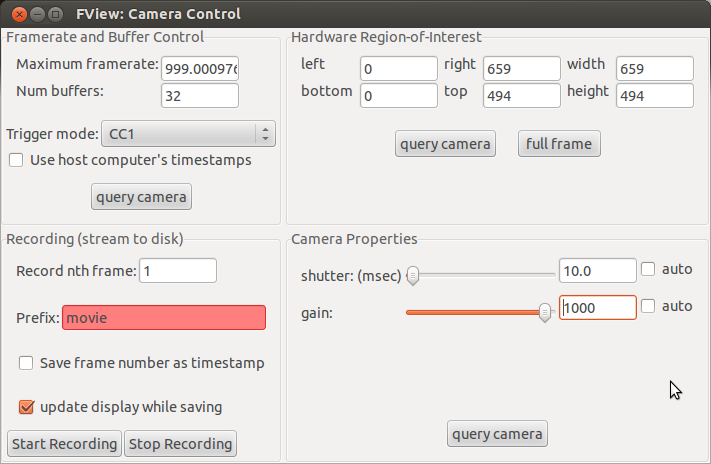
Turn on the infrared LED and put the filter in front of the camera (or adjust the lighting in whatever way is necessary for your experiment). Adjust the “gain” in the camera controls until you see a clear picture, where the wings of the fly are very bright and the background is very dark.
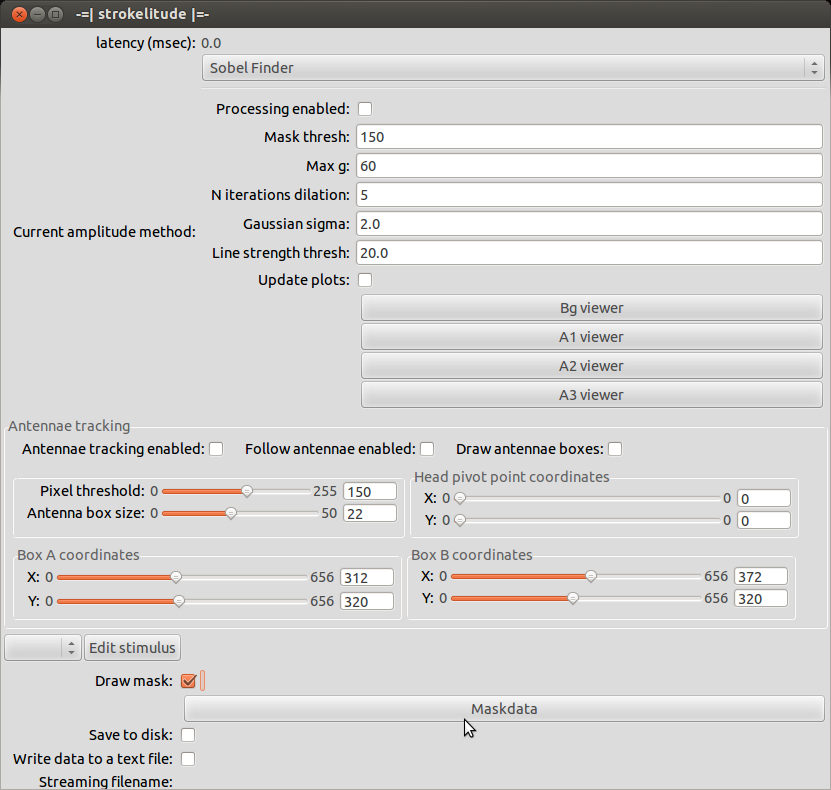
Go back to strokelitude and click “Processing enabled”.
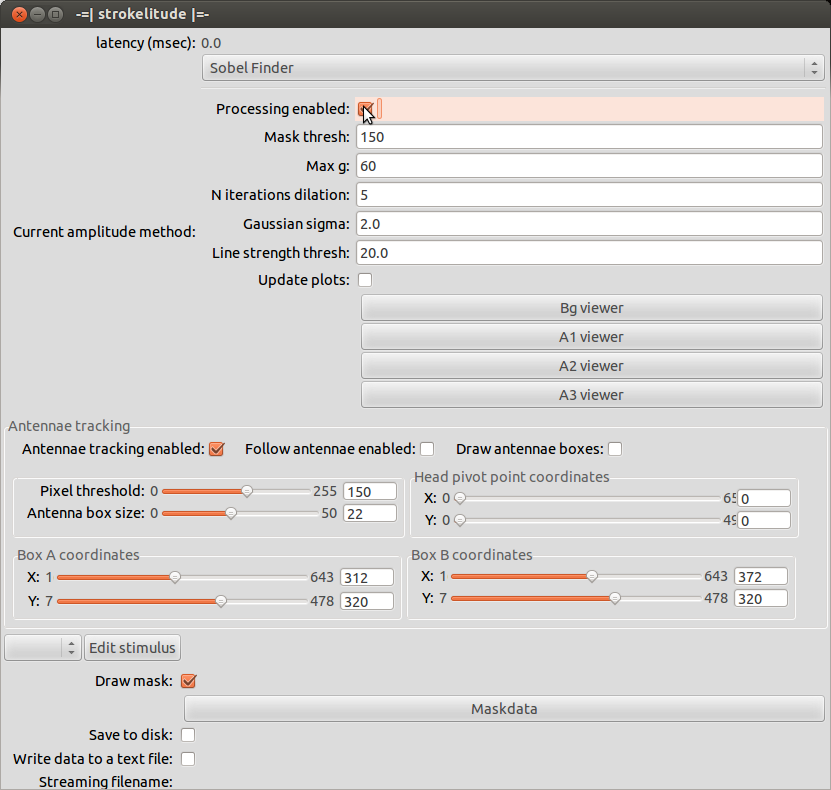
This will make two new green lines appear. They originate from the two small circles and go through the measurement sectors. These lines indicate the position that strokelitude calculates for the wing. This is the data you will record (even though you are not recording yet). Make sure that these lines track the wings well. Optimally, they should always be exactly on the border of the wing.
![]()
You can use “gain” to make the image brighter or darker. Also, the parameters “Mask thresh” and “Max g” (below the “Processing enabled” bottom in strokelitude) may be helpful. Raising max g may reduce the amount of error (frames in which strokelitude looses track of the wings). The mask threshold determines at which brightness level strokelitude estimates the border of he wing. As a rule of thumb, if the tracking lines jump down into the dark background area, you should raise the threshold. If the tracking lines jump up into the bright areas of the wing, you should lower the threshold.
However, pay attention to how homogeneous the wings are. Ideally, the wings should be a uniform white smear and the background should be black. If there is a bright stripe at the front of the wing and then a somewhat darker area behind it, this may lead to trouble, since strokelitude may switch between the two borders of the bright area. Sometimes it can help to put the measurement vectors further outside or further inside. Also, make sure that both wings are illuminated equally well, otherwise optimizing the settings for one wing will make you loose the other.
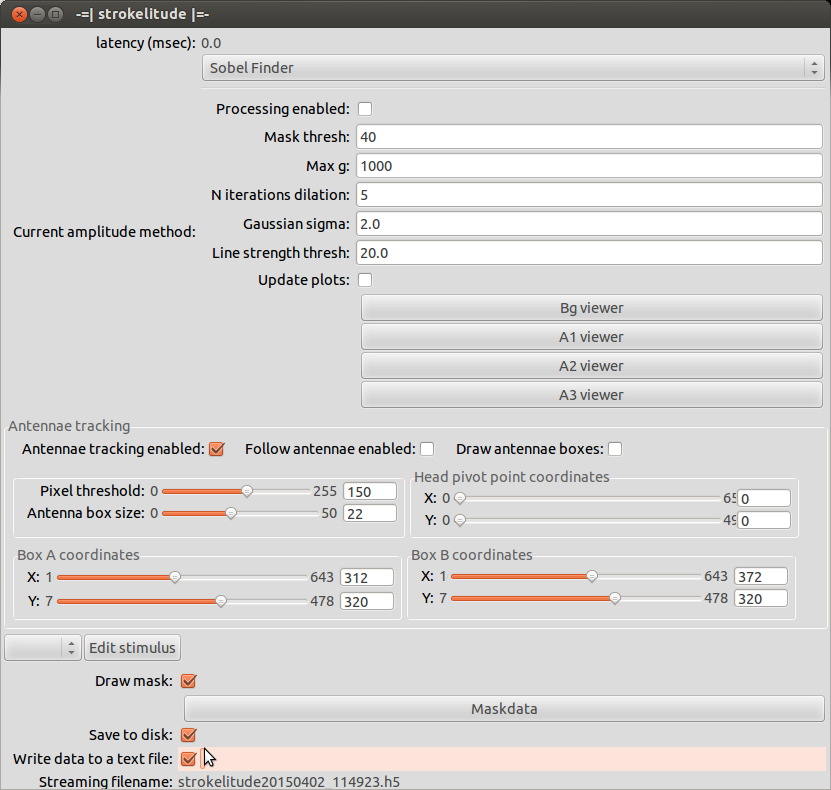
Once you made sure that strokelitude tracks the wings well, you can start the actual recording. Untick “Processing enabled” and select “Save to disk” (to save data in .h5 format) and “Write data to a text file” (to save data in .txt format). Then click “Processing enabled” to start the recording. If you want to record a video while you save the data, click “Start recording” in the camera controls.
Once you have finished the recording, disable processing. Find the data files, rename them and sort them (it is best to do this after every recording, since the file names strokelitude generates are generic). You can set the output directory under “File”. If you make several recordings, make sure to close fview between the sessions. Otherwise, strokelitude will continue to write the data into the same file.
