Objective
Investigation of behavioral responses (approach or avoidance) in Drosophila under optogenetic activation of specific dopaminergic neurons in an operant conditioning paradigm.
| Day | 1 | 2 | 3 | 4 |
| Tasks | Collecting flies | Preparing test vials / Sorting flies | Inverting vials | Fly preparation / Experiment setup |
Day 1: Collecting Flies
• Collect one-day-old flies from the breeding vial.
• Incubate the flies overnight at 25°C in a large vial.
Day 2: Preparing Test Vials & Sorting Flies
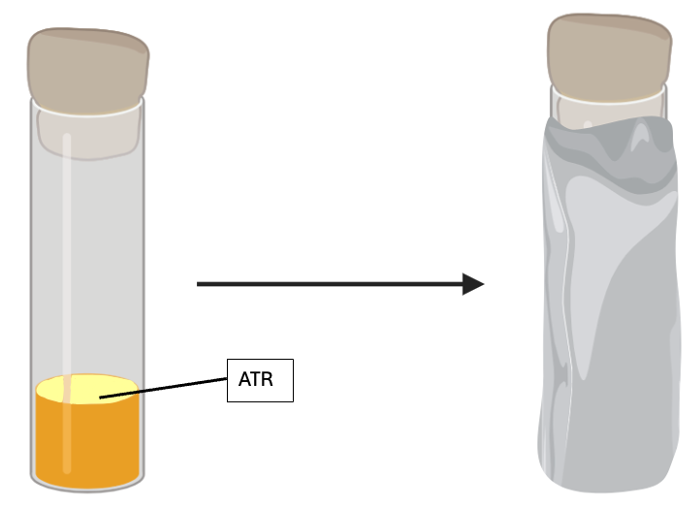
Preparing Test Vials:
1. Use small, air-bubble-free vials without yeast.
2. Apply 15 µL of all-trans-retinal (ATR, 200 mM in ethanol) or 15 µL of ethanol (control solution) evenly on the glass surface. Wear gloves.
• Note: ATR is a chromophore required for light-dependent activation of channelrhodopsin.
3. Tilt the vials to distribute the solution evenly across the surface in small droplets.
4. Wrap vials with aluminum foil to prevent light exposure.
Sorting Flies:
1. Anesthetize flies from the previous day on a cooling station.
2. Sort approximately 30 male flies per condition.
• Use a soft brush to avoid injuring the flies.
• If applicable, ensure Balancer chromosomes are not selected.
3. Transfer 30 males carefully into ATR and control vials using the brush.
4. Store vials horizontally for the first 10 minutes to prevent flies from sticking to the food.
5. After 10 minutes, invert vials and incubate at 25°C. Cover vials with a box to minimize light exposure and ensure the aluminum foil is sealed properly.
Day 3: Inverting ATR Vials
1. Invert the vials so the flies can access the food better.
2. Incubate for another night at 25°C, allowing flies to fully metabolize ATR.
Day 4: Fly Preparation & Experiment Setup
Materials for Fixation:
Standard tweezers, Reverse tweezers, UV glue, Fly holder, 0.6 mm fishing line (~2 cm length), Clipper (to trim the fishing line), Sharpened dissection needle (for spreading glue)
Fly Preparation:
1. Fix each fly individually by attaching it to a 0.6 mm thick fishing line (~2 cm long) using UV glue at the thorax.
• Ensure a 90-degree angle between the fly’s body and the line.
2. Secure the optic fiber in a micromanipulator clamp.
3. Use a sharpened dissection needle to apply a small drop of UV glue at the bottom end of the optic fiber.
4. Position the optic fiber on the thorax using the micromanipulator, then harden it with UV light for ~15 seconds.
5. Store the fixed flies for one hour at 25°C in a dark box.

Fly Testing:
1. Feed the flies for 5–10 minutes with a sugar solution before testing.
• Place them on moist filter paper with sugar granules inside a dark chamber.
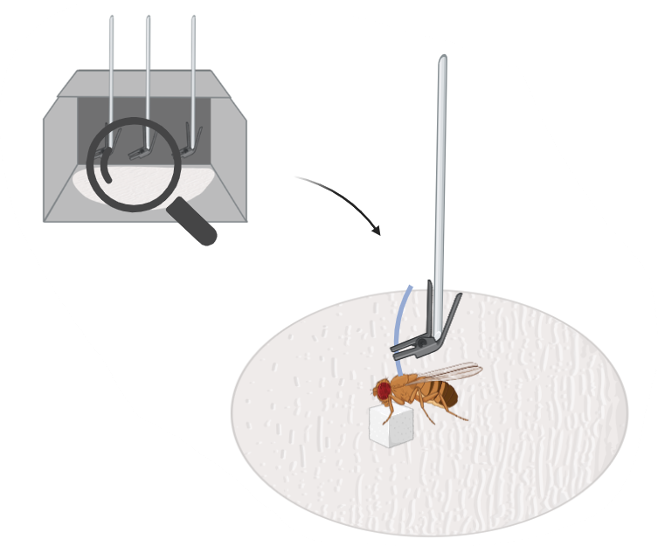
2. Carefully remove the flies from the dark chamber.
3. Trim the fishing line to ~5 mm length using scissors or a clipper.
4. Test three flies simultaneously per trial.
5. Position the flies with the optic fiber secured in a clamp under the light source.
• Adjust the Joystick platform so that flies hang in a neutral position, without stretching or pressing their legs downward.
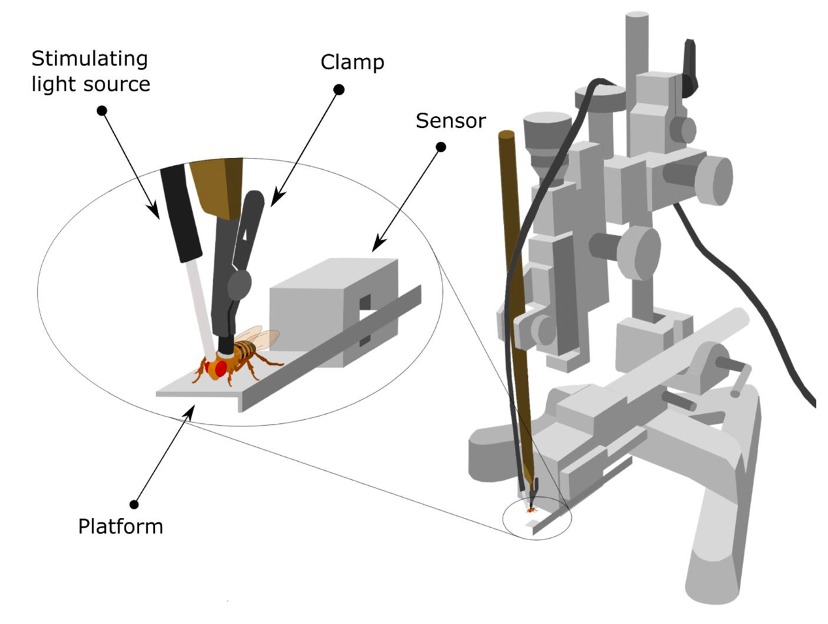
6. Place a cardboard cover above each Joystick apparatus to ensure flies are only exposed to the joystick light.
Starting the Experiment & Program Settings:
1. Start the Joystick program and set the light color:
• Red light: Set voltage to 6V. (~450-500 Lux)
• Yellow light: Set voltage to 3.8V. (~750-850 Lux)
• Measure Lux values using a light meter placed at the fly’s position to ensure consistent illumination across trials.
• Set the light meter to display the maximum Lux value to ensure accurate measurement of peak illumination.
2. Under “Adjust Zero Settings”, ensure that the platforms are balanced without flies:
• The red, blue, and green lines should align with the black zero line.
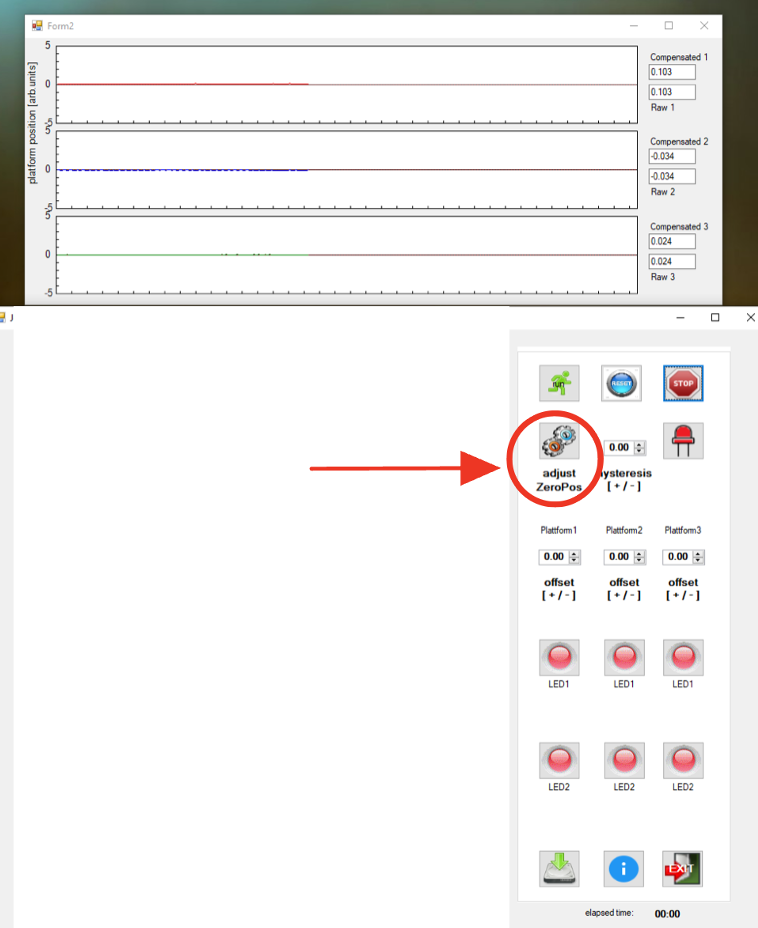
• Coarse adjustment: Rotate the platform wheel carefully.

• Fine adjustment: Use the arrow keys in the program.
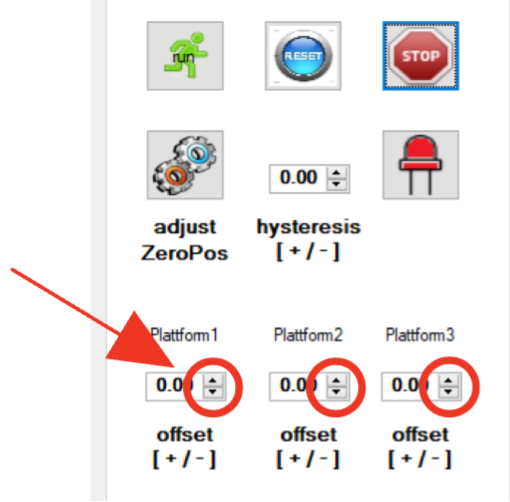
3. Adjust further settings according to the protocol:
• Te: Baseline trials (no stimulus).
• M & M_S: Trials with light stimulus.
• Alternate “Right” & “Left” after each fly.
• Set duration to 60 seconds per trial period.
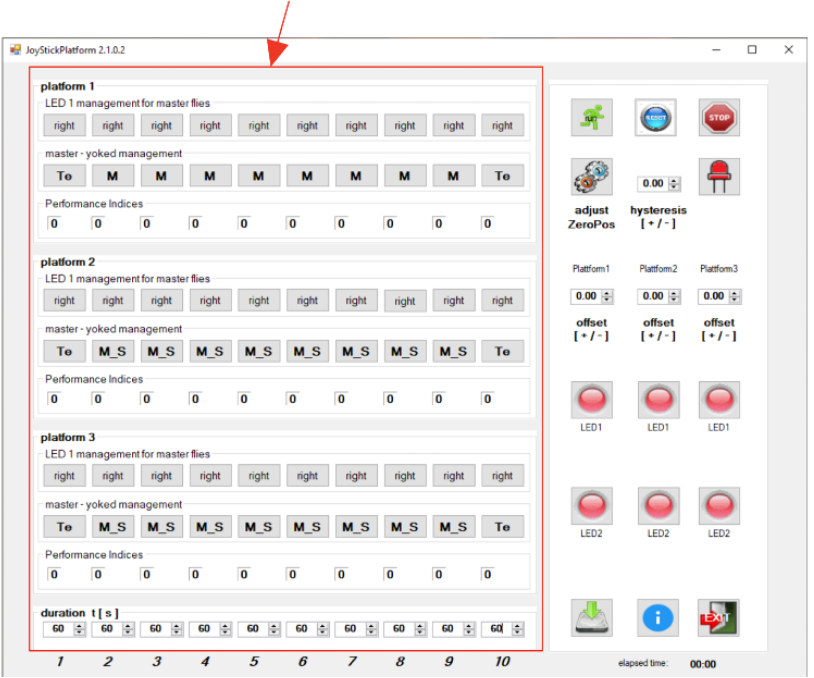
4. After setup:
• Click: STOP → RESET → RUN
• Check “Elapsed Time” to track progress.
• The program automatically stops after ~12 minutes.
5. Save the results:
• Create separate folders for Yellow and/or Red light trials before saving.
• Name the dataset: Example → 01.01.24_FlyLine_Yellow.dat
• Also save a corresponding text file in the same folder.

6. Data Formatting for Analysis:
1. Use tabs between columns when saving text files.
2. The first column must match the exact (.dat) filename.
3. The second column should contain the fly line name, as this will be used for data merging in R.
4. Any text following “#” is ignored by R and can be used for comments to improve data traceability.
7. Data Analysis in R:
1. Open the correct R script:
• Red light: Open Red.R.
• Yellow light: Open Yellow.R.

9. Modify the following lines in R:
• Line 5: File path to the .dat files (use double slashes //).
• Line 6: File path to the .rmd file.
• Line 7: Define the HTML filename for the results.
• Line 8: Enter the correct name of the text file.
9. Analyze data using the generated HTML file.
You can download the R script required for data analysis from the following link: https://github.com/brembslab/Platform-Drosophila/blob/master/Platform-Optogenetics/Droso_Praktikum_Joystick.R
